


Perfect Fit Blinds

Perfect Fit Blinds by Louvolite - Revolutionary "NO-DRILL" window blinds that SNAP-FIT to become a seamless part of your UPVC window, door or conservatory. NO SCREWS! Click an image below to explore the range, get an instant price and Buy Online!
- Protect warranty - No drilling!
- Order Fast and FREE Fabric Samples!
- Easy installation - Snap-fit in 30 seconds!
- Fast Delivery to your door!
- Made to your measurements!
- UK manufactured with Genuine Louvolite for guaranteed durability.
Perfect Fit Blinds are available as roller, aluminium or wooden venetian, pleated or cellular blinds and shutters. They are the ideal solution for all types of UPVC windows and doors, especially french doors and tilt and turn windows. They keep window sills clear and are completely child safe!
Click an image below to Buy Online at UK's Lowest Prices


Filter Our Products
OUR PICKS
Perfect Fit Blinds are available in a number of different blind types - Perfect Fit Venetian, wooden, pleated, honeycomb, roller and shutters. Below are a selection of our favourites from accross these blind types. You can order free fabric samples, enter your sizes for an instant price and buy online with secure payment.


Voile and Sheer Perfect Fit Roller Blinds
Voile and Sheer Perfect Fit Roller Blinds
There's something timeless about the quality of light that filters through a sheer blind — soft, even, and flattering to any room. Our voile and sheer Perfect Fit roller blinds recreate that effect in a format designed for modern uPVC windows and doors, snapping cleanly into the frame with no drilling required. Daytime privacy, beautiful diffused light, and a seamless finish — all in one made-to-measure blind.


OPAQUE PVC BLACKOUT
Opaque is an excellent quality PVC/Fibreglass based blackout fabric. Fire retardant, completely wipe clean and moisture resistant, it is ideal for use in residential and commercial environments alike! Popular in kitchens and bathrooms, universities, student accommodation, and schools.


Privacy Perfect Fit Roller Shades
Privacy Perfect Fit Roller Blinds
Your home should feel like yours — seen only by those you choose. Our privacy Perfect Fit roller blinds are made to measure, snapping directly into your uPVC window or door frame with no drilling required. They soften incoming light while keeping prying eyes out, making them an ideal choice for ground-floor rooms, street-facing windows, and anywhere a little more seclusion goes a long way.


3% Screen Perfect Fit Roller Blinds
3% Screen Perfect Fit Roller Blinds
Keep your view, lose the glare. Our 3% screen Perfect Fit roller blinds are made to measure and snap cleanly into your uPVC window or door frame with no drilling required, filtering harsh sunlight while preserving your outlook and keeping your room feeling open and connected to the outside. An ideal choice for living rooms, home offices, and conservatories where glare is a problem but the view is worth keeping.


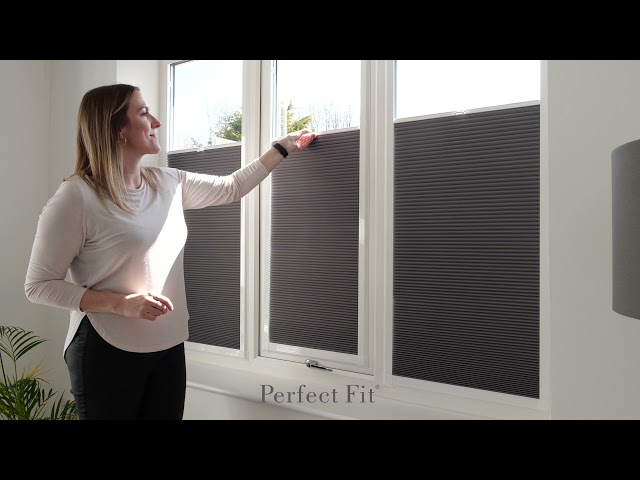
Introducing Perfect Fit Blinds by Louvolite!
Welcome to NewBlinds.co.uk, home of Perfect Fit Blinds by Louvolite. Made to your exact sizes - the snap-fit, no-drill system means fitting blinds has never been simpler! Watch the video play-list below to see perfect fit blinds in action, and read on below.
Frequently Asked Questions about Perfect Fit Blinds
What are Perfect Fit Blinds?
Dream Perfect Fit Blinds offer a fuss-free installation that clips directly onto the window frame. Designed by Louvolite, it consists of the blind itself, mounted in a painted aluminium frame. The frame is available in a variety of colours including white, anthracite grey, brown, silver, and wood finishes, and it can be effortlessly clipped onto your window.
Perfect Fit Venetian Blinds feature a drill-free installation, using a unique bracket system that requires no screws that simply slide under the window beading at the outside edge of the window glass, and the frame, including the blind, is mounted on these brackets.
The perfect fit frame is suitable for a number of different common blind types - roller, Venetian and wooden blinds, pleated and cellular shades and vision (a.k.a day and night) blinds. Each of these blind types has a myriad of fabric or slat options, making this no drill blinds system one of the most adaptable and creative on the market!
What are Perfect Fit blinds, and would they be suitable for French doors?
Perfect Fit blinds are a revolutionary window covering that is specifically designed for uPVC window frames and doors. These bespoke window dressings are called Perfect Fit because they integrate seamlessly into the double glazing of your uPVC windows and doors, maximizing space efficiency. This makes them a fantastic, attractive, and minimalistic window covering option.
Perfect Fit blinds are especially ideal for doors because they move with the doors when opened or closed, eliminating the need to adjust the blinds each time you use the door. For French doors, these blinds provide a practical solution with a contemporary design that enhances both style and function, especially when combined with a blackout lining for added privacy. They are also available in several designs and fabrics, allowing you to match them with your home's decor.
We offer a broad range of high-quality French door blinds UK - Perfect Fit blinds are one of them. They offer added convenience and a luxurious feel for your French doors. Contact us for more information on how to transform your doors and windows with our Perfect Fit blinds.
What makes perfect fit blinds a popular choice for homeowners?
Perfect-fit blinds are increasingly admired due to the unique design that allows them to be fitted flawlessly onto uPVC windows without any drilling or screwing. Aside from the simple installation process, homeowners favour perfect-fit blinds due to the diverse range of styles and materials available, varying from roller and pleated to Venetian blinds.
For much wider windows, an alternative to the Perfect fit would be electric honeycomb blinds. These blinds offer the perfect combination of high energy efficiency, using honeycomb pockets to block out heat in summer and retain warmth in winter, making them an eco-friendly and cost-effective solution. Furthermore, the automated feature of electric honeycomb blinds provides the convenience of controlling light and privacy settings at the touch of a button.
Are Perfect Fit Roller blinds available in extra wide sizes?
Our Perfect Fit Roller Blinds are available in various sizes up to 1400mm wide. Where you have an extra wide window consisting of multiple panes, you can order a perfect fit roller blind for each pane. To cover windows that are up to 4 metres wide, you can also take a look at our, Extra wide roller blinds. These are a great option for large windows or sliding doors.
Can I use Perfect Fit Blinds with my PVC windows?
Yes, Perfect Fit Blinds are specially designed for uPVC windows and doors, ensuring a flawless fit with their integrated frame. When installing the PVC window blinds, there is no need for drilling or screwing into your window frames. Effortless installation allows you to simply click these blinds into place, enhancing the look of your windows with a flawless fit. You have a range of options to choose from, including roller, Venetian, and pleated styles to complement any room in your home.
Can I install Perfect Fit blinds without drilling into my windows?
Yes, absolutely. Perfect Fit blinds are an ideal solution for those who are hesitant to drill into their window frames. These innovative blinds cleverly fit directly into the window without the need for any drilling or screwing. The installation process involves a unique frame that clips to brackets which are slid between the glass and the rubber gasket of your UPVC windows.
This makes them the perfect blinds without drilling, causing no damage to your windows. Plus, these blinds can be effortlessly clipped on and off, making them easy to uninstall and relocate if needed. Please note that this system is specifically designed for UPVC windows, and may not work with other types.
How do Perfect Fit Blinds compare to other window blind options?
Perfect Fit Blinds provide a seamless look and practical benefits for your living spaces. They are designed to integrate seamlessly with the uPVC window frame, providing optimal control over light and privacy. Unlike traditional window blind options, they do not require any drilling or screwing into your window frames. However, if you have roof windows, you might consider Velux Blinds UK, which are designed specifically for skylights and provide similar benefits.
Can I install Venetian blinds on a bay window?
Yes, Venetian blinds can be used in most bay windows. Venetian blinds for bay windows are available in wood or metal and as standard blinds, Perfect fit or INTU blinds. Some bays do not have much space for the fitting of the headrail, if this is the case you may wish to look at the Perfect fit or INTU range of blinds, or Perfect fit shutters as these fit to window pane of the actual opening window rather than in the recess or the ceiling of the bay.
Can I use Perfect Fit roller blinds for my patio doors?
You can use roller blinds for patio doors. Perfect Fit roller blinds can be used subject to the frame being compatible. If the doors are sliding, there must be be sufficient clearance for the sliding panel to pass the perfect fit frame. Perfect Fit Roller Blinds are designed to fit neatly into the frame. This eliminates any swinging or banging as the door is used. Roller blinds offer an excellent way to control light, give privacy, and enhance the aesthetic value of your patio door. They are also easy to install and can be manually operated or motorised.
Do you sell electric blinds for windows?
Yes, at NewBlinds.co.uk, we do offer a wide selection of electric blinds for windows. The perfect fit range, only the Roller blind version can be motorised. Motorised blinds are not only convenient but also add a touch of modern sophistication to your home or office. Simply adjust the lighting in your room at the touch of a button! Visit our website for more details.
Are Perfect Fit Blinds suitable for conservatories?
Yes, Perfect Fit Blinds are an excellent choice for your conservatory. These blinds for conservatory settings are uniquely designed to fit snugly into the window frame without the need for drilling or screwing, causing no damage to your conservatory. Plus, with their stylish look and wide range of colours, they add aesthetic appeal while maintaining practical functionality such as light control and insulation.
Can Perfect Fit Blinds be used on bifold doors?
Yes, Perfect Fit Pleated Blinds and Honeycomb Blinds are ideal for use with uPVC doors that are double glazed. The doors must be internally beaded with a bead depth of more than 18mm, and have a rubber gasket. Our bifold door blinds are designed to be unobtrusive and sleek, fitting seamlessly to the door frame. This provides a clean, clutter-free look and allows for full use of the door. With a range of styles and colours available, you're sure to find the perfect solution for your bifold doors.
Do you offer an electric option for wooden blinds suitable for a living room?
Absolutely, we do have a range of superbly designed electric living room wooden blinds available. Using an easy-to-use remote handset, you can easily adjust your blind's position at the touch of a button from the comfort of your sofa! The convenience and luxury of our electric living room wooden blinds make them a favourite among our customers.
Can I use Perfect Fit Blinds for my kitchen wood blinds?
Absolutely, our Perfect Fit Blinds are an excellent choice for kitchen wood blinds. They offer a clean and streamlined appearance because they fit directly onto the window, leaving your kitchen window sills and workspace clutter-free. Further, as they have no hanging cords or chains, they ensure the highest safety standards for households with children or pets.
Are Perfect Fit blinds drill-free?
Yes, Perfect Fit Blinds are no drill blinds. They simply clip-fit into the window beading, so there is no need to drill or screw into your window frame. This makes them a great option for renters or homeowners who want to avoid damaging their windows. Perfect Fit Blinds are available in a variety of styles and materials, so you can find the perfect ones for your home.
Are wooden shutter blinds a good option for perfect fit blinds?
Wooden shutter blinds are available using the perfect fit no drill system. However, rather than wood, perfect fit shutters are made from robust and durable wood-effect PVC. No drill Perfect Fit Shutter blinds are a lower cost alternative to traditional plantation shutters, they are easy to measure, install, remove, clean and maintain.
What types of blinds are available as Perfect Fit?
At Newblinds.co.uk, Our Perfect Fit Range Includes:
-
Perfect Fit Venetian Blinds: Versatile shading for any window. Raise and lower with a discrete handle fitted to the bottom rail. Tilt with a simple twist of a transparent control rod. Available in over 100 different colours and finishes, find yours here.
-
Perfect Fit Roller Blinds: A range of shading fabrics for every application. Blackouts, privacy, decorative, voiles and more. The roller tube and fabric are concealed in an elegantly curved fascia at the top of the blind frame. Have a look at our stunning range here.
-
Perfect Fit Pleated and Honeycomb Blinds: Our Perfect Fit Pleated and Cellular Blinds allow you to control the sunlight coming into your home, and also enhance your privacy. We have a huge range of stylish fabrics ranging from plain and patterned single pleats to privacy and blackout cellular fabrics. Can be installed as bottom-up or top-down blinds. Check out our full range here.
-
Perfect Fit Conservatory Blinds: Snap-fit installation to PVC-u Conservatories - no drilling or screws are required! Our Perfect Fit Blinds are specifically designed for conservatories. You can buy Conservatory Blinds Online, or alternatively, Request a brochure/home visit.
-
Perfect Fit Wooden Blinds: Our beautiful Perfect Fit Wooden Blinds will transform any room in your home! There's nothing like the hue of real wood to add a touch of warmth to your windows. Available in 10 different stunning finishes, you can find your ideal blind here.
Which type of windows and doors are Perfect Fit Blinds suited to?
Originally, Perfect Fit was intended as a system to allow the installation of blinds for upvc windows without invalidating their warranty by drilling and screwing. However, their use has quickly been adapted to different window types. We also now commonly see them used as door blinds and they are a particularly popular solution for bi-folding doors and french doors.
How to Fit Perfect Fit Blinds?
The beauty of this no-drill blinds system is that they are so simple to install. The blind will be supplied with discrete brackets, which slide into the beading around the edges of the glass. The blind's frame mounts within an integrated frame, which effortlessly clips onto these brackets. Once installed, the blind appears to be an integral part of the window or door.
You will find information on measuring and installing each Perfect Fit Blind type on the fabric page itself. We have video guides and written instructions to help you along your way. The best thing about this clip-fit installation method is that you don't need to use drills or screws to mount your new shade. This system is ideal for all DIY skill levels and helps preserve the warranty offer of your windows and doors.
Who manufactures perfect fit blinds?
Perfect Fit Blinds by Louvolite are custom-made and made to measure by skilled fabricators worldwide, using high-quality components. Perfect Fit Blinds are ideal for conservatories, french doors and bi-fold doors, in addition to being entirely compatible with the majority of PVC Windows.
Are perfect fit blinds easy to clean?
Perfect Fit Blinds offer the perfect blend of style and practicality, and they are as easy to clean as any other blinds. They clip fit into the window beading up against the glass. To clean the blind and the glass behind the Perfect Fit Blinds, the blind frame can be unclipped from the bead-fix brackets. This means it is quite simple to remove for thorough cleaning or to clean the window or glass itself. The Perfect Fit frame itself can be wiped clean. The blind that is within the frame can be cleaned according to the manufacturer's instructions.
Do perfect fit blinds damage seals?
The window seal should not be harmed by the perfect fit brackets - so long as the seal is not adhesive glazing tape, which is no longer commonly used, and care is taken when inserting the bracket. The blind's installation process is gentle, ensuring the rubber seal of your window remains intact. To install a Perfect Fit Frame, just slide the brackets between the glass and the rubber gasket behind the internal beading. If this proves to be difficult, then do not force the bracket. Some washing-up liquid can be used to lubricate the bracket, making it easier to slide the bracket into place. Once in place, the Perfect Fit frame and the blind simply clip-mounts onto the brackets.
How are perfect fit blinds attached?
Perfect Fit blinds come with their own unique framework system to attach to the beading on your PVC window frame. This frame clips onto brackets which are inserted between the internal beading of the window frame and the glass. There is no need for drills or screwdrivers. The blind itself is coupled to the Perfect Fit frame system and can be raised and lowered within the window casing.
Can perfect fit blinds be used in bathroom?
Perfect Fit Blinds can certainly be used in bathrooms. New blinds are a great way to improve the aesthetic value of any window, including those in bathrooms. Perfect Fit Blinds are particularly suited to bathrooms because, the blinds are mounted within a neat frame, creating a seamless look that appears as an integral part of the window frame.
This means that the blinds are self-contained within the frame against the glass and do not hang down onto sills, keeping them free. The choice of blind type is also flexible. You can opt for blind types which are better suited to damp environments, such as Venetian blinds or roller blinds with moisture-resistant fabrics. You can select a blind type or fabric which provides privacy, and control the amount of light coming in.
Can you open windows with perfect fit blinds?
Windows and doors can be opened and closed as normal when Perfect Fit Blinds have been installed. This is one of the key advantages of the Perfect Fit Blind system. By comparison, a normal free-hanging blind would need to be opened (raised or drawn open) to allow access to the window handle and window.
Since Perfect Fit Blinds are clip-fitted to the window frame and installed directly against the glass, the window handle can be accessed at all times, regardless of whether the blind is raised or lowered. When the window or door is opened, the blind simply travels with it as if it were an integral part of the frame.
Because the blind is held within a Perfect Fit frame, the blind will not swing or clatter. Please note, that the ability to open the blind, does not necessarily mean that the window should be left open in all conditions. Humid, wet or damp outside conditions may cause the blind itself to become damp or wet, which depending on the blind or fabric type may cause damage or shorten the life span of the blind.
Do perfect fit blinds damage double glazing?
Perfect Fit Blinds ensure a seamless look without damaging the uPVC frame or double glazing. Most importantly, Perfect Fit Blinds do not require drilling or screwing into the double-glazed window frame for installation. Many window suppliers will not honour the warranty of the window if the frame is pierced with screws.
Instead, perfect fit is a clip fit blind system, which is mounted on clever brackets which slide between the glass and the internal beading of the window. So long as your window is internally beaded with a rubber gasket, rather than adhesive glazing tape, the bracket should slide into place. You can also use washing-up liquid to lubricate the bracket. So long as care is taken, perfect fit blinds should not damage a double-glazed window.
How far do perfect fit blinds protrude?
A standard perfect fit frame will normally protrude 10mm from the surface of the window frame into the room. Exceptions are where the beading of the window is shallow, in which case there may be a gap between the face of the window frame and the perfect fit frame, which is often filled with adhesive foam. Another exception is the Perfect Fit Roller Blind fascia element, which is rounded to contain the roller tube and fabric and projects beyond the standard side and bottom frame.
How do you clean behind perfect fit blinds?
Perfect Fit Blinds can easily be removed from the window frame to enable you to clean the glass and window behind the blind, thanks to their effortless clip design. Perfect Fit blinds are installed onto brackets which clip-fit into the perfect fit frame, holding the blind in place. By raising the blinds, you will see that the brackets clip into small holes within the side frame of the blind.
These holes are usually positioned towards the bottom and top of the side frame profile but for tall blinds, there may also be a hole towards the middle of the side frame. Simply insert a flat-headed screwdriver into these holes to lever the frame free of the bracket. This can be done for each bracket until the Perfect Fit frame comes free of the window.
Once the blind has been removed, you can clean the window and its frame as normal. Depending on the blind type mounted within the Perfect Fit frame, cleaning of the blind itself may differ. Venetian and wooden blinds can be easily cleaned with a feather duster and some furniture polish. Pleated and honeycomb clip-fit blinds can be cleaned carefully using a Hoover with a brush nozzle, allowing you to safely clean the dust from your perfect-fit blinds.
Spots and stains can be removed by wiping the affected area with a cloth dampened with warm water and a drop or two of cleanser. Before cleaning the fabric of a roller blind such as a clip fit roller or blackout blind, you should check the fabric manufacturers cleaning instructions.
Can Perfect Fit Blinds be used on UPVC windows?
Yes, Perfect Fit Blinds and Shutters can be used on UPVC windows. The blinds simply clip into the beading of the window pane, so there is no need for drilling or screws. This makes them a quick and easy way to add privacy and stylish window dressing to your windows.
Can I install roller blinds using the Perfect Fit system?
Yes, you can easily install Perfect Fit roller blinds yourself. Roller blinds are one of several blind types available within the Perfect Fit system, which also includes pleated, honeycomb, Venetian, and Vision blinds. This system is mounted using discreet brackets that slide between the rubber gasket and the glass behind the window beading—meaning no drilling or screws are required. Perfect Fit blinds provide a sleek, integrated look while offering excellent light control and privacy. Available in a wide range of colours and designs, they blend seamlessly with any decor.
If you require any extra information on our Perfect Fit Blinds, please feel free to contact us at [email protected]